GPON Stick Setup Guide: Replace Your ISP ONT on a UniFi Gateway Fiber
Swapping your ISP’s ONT and router for a GPON stick sounds like a simple plug and play hardware swap. It isn’t. The stick has to convince your ISP’s network it’s the exact same ONT you just unplugged, while your own router takes over everything else that box used to handle.
A typical fiber connection looks like this:
Fiber → ISP ONT → Ethernet → ISP router or your router
With a GPON stick, the ONT and the Ethernet hop disappear: the fiber terminates directly inside your router.
Fiber → GPON ONU/ONT stick → SFP port in your router
I configured this on my own UniFi Gateway Fiber (UCG-Fiber), having NOS / WOO as the ISP in Portugal, to get rid of the all-in-one ONT+router+AP they provided and replacing it with an FS.com GPON-ONU-34-20BI SFP stick inserted directly into the SFP+ port of the gateway. I covered the reasons why I did it in a separate post, so you may want to check that out.
The stick runs OpenWRT on a Lantiq chipset and exposes a management interface over SSH at 192.168.1.10, which is what lets you read and rewrite the GPON identity values the ISP’s own ONT would normally report.
Key Takeaways
- Authentication is the real hassle: it requires mirroring the GPON serial number and OMCI vendor/equipment IDs from your existing ISP ONT. Some ISPs also require a PLOAM or LOID password, but mine didn’t, so this guide skips those steps.
- The FS.com GPON-ONU-34-20BI runs OpenWRT and exposes SSH management at
192.168.1.10; configuration goes throughsfp_i2candfw_setenv, not a web UI.- Registration success shows as
onu_state: 5inonu ploamsg. Getting a WAN IP after that still depends on your ISP’s VLAN, PPPoE, or DHCP configuration.- The “Faulty SFP EEPROM” alert UniFi shows for this stick is cosmetic: it’s caused by pin sharing and an emulated EEPROM, not a real hardware fault.
The Biggest Challenge: ISP Authentication
The ISP may identify the ONT using one or more of:
- Serial number
- GPON vendor ID
- PLOAM password
- LOID and LOID password
- OMCI capabilities
- Optical parameters
- DHCP client identity
- PPPoE credentials
- VLAN configuration
- MAC address or other service-specific identifiers
Some providers make replacement relatively easy if they allow the customer to register an ONT serial number. Others expect the original ONT’s identity and may reject an unrecognized device. Even if the GPON stick successfully registers optically, that does not guarantee internet access. You may still need the set service VLAN, PPPoE credentials, DHCP options, IPv6 settings, or MAC address.
Step-by-Step Configuration
The rest of this post walks through the process end to end: gathering the values your ISP uses to authenticate your line, unlocking and configuring the stick, then verifying registration with the OLT, and bringing up WAN on the UniFi gateway. “ONT” and “ONU” both refer to the same device throughout this guide, as ISPs and vendors use the terms interchangeably.
Prerequisites
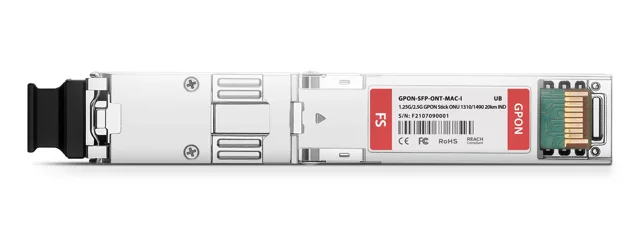
Before starting, make sure your GPON stick supports custom MAC and serial number configuration: this guide uses the FS.com GPON-ONU-34-20BI.
Then flip your ISP’s ONT over and write down the following fields. The values below are examples so replace them with your own:
- GPON Serial Number:
SKYW1A2B3C4D(vendor prefixSKYW+ hex1A2B3C4D) - Raw GPON SN (hex):
534B59571A2B3C4D - ONT MAC Address:
AA:BB:CC:DD:EE:FF - OMCI Vendor ID:
SKYW(derived from the first 4 chars of your GPON serial number) - OMCI Equipment ID:
EX0001A(your ONT model number)
Step 1: Physical Installation
- Power off your UniFi Gateway Fiber.
- Insert the GPON-ONU-34-20BI into the SFP+ WAN port of the gateway.
- Connect the ISP fiber cable (SC/APC) to the stick.
- Power the gateway back on.
- Connect a computer to a LAN port on the UniFi gateway.
Note: The stick’s default management IP is
192.168.1.10. If your LAN subnet is already192.168.1.x, you may need to temporarily set a static IP (e.g.,192.168.1.50) on your computer to access the stick.
Step 2: SSH into the Stick
ssh ONTUSER@192.168.1.10
# Password: 7sp!lwUBz1
If the connection is refused, wait ~60 seconds for the stick to fully boot.
Step 3: Unlock the Bootloader
⚠️ Do this first, before making any other changes. This prevents a brick if a firmware update goes wrong.
Run the following commands over SSH:
fw_setenv bootdelay 5
fw_setenv asc0 0
fw_setenv preboot "gpio set 3;gpio input 2;gpio input 105;gpio input 106;gpio input 107;gpio input 108"
Step 4: Configure GPON Identity
These are the values your ISP uses to authenticate your line. Match them exactly to your ISP ONT’s values.
4a. Set the GPON Serial Number
set_serial_number SKYW1A2B3C4D
Verify it was saved:
sfp_i2c -g
4b. Set OMCI Vendor ID (ME 256)
This matches the first 4 characters of your GPON serial number (SKYW1A2B3C4D), which is always the vendor ID.
sfp_i2c -i7 -s "SKYW"
4c. Set OMCI Equipment ID (ME 257)
sfp_i2c -i6 -s "EX0001A"
4d. Set OMCI Hardware Version (ME 256)
sed 's/256 0 HWTC 0000000000000/256 0 SKYW GN630VE       /' \
  /rom/etc/mibs/data_1g_8q.ini > /etc/mibs/data_1g_8q.ini
I was surprised to learn that NOS / WOO checks the ONT’s exact hardware version string, so padding the Equipment ID alone wasn’t enough. The field is 14 characters wide (GN630VE padded with spaces), so you must log into the original ONT’s web UI before disconnecting it to grab the real string, since there’s no way to retrieve it afterward.
Step 5: Set Management MAC Address
Set the stick’s MAC address to match your ISP ONT’s MAC. This is important if your ISP authenticates by MAC address, which is the case of NOS / WOO:
uci set network.lct.macaddr=AA:BB:CC:DD:EE:FF
uci set network.host.macaddr=AA:BB:CC:DD:EE:FF
uci commit network.lct.macaddr=AA:BB:CC:DD:EE:FF
uci commit network.host.macaddr=AA:BB:CC:DD:EE:FF
Note: If your ISP assigns different MACs to the management vs. data interface, you may need to increment the last octet by 1 or 2 for the
hostMAC. The value above uses the label MAC for both.
Step 6: Verify GPON Registration
After configuring, reboot the stick:
reboot
Wait ~60 seconds, then SSH back in and check the ONU status:
onu ploamsg
Look for onu_state in the output. The expected operational state values are:
| State | Meaning |
|---|---|
1 | Initial state |
3 | Serial Number |
4 | Ranging |
5 | Operation (✅ Online) |
6 | POPUP |
State 5 is what we want to see. It means the stick has successfully authenticated and is online with the OLT.
Step 7: Configure UniFi Gateway Fiber
Once the stick is authenticating correctly:
- Open the UniFi Network application.
- Go to Settings → Internet → ISP.
- Set
DHCPunder IPv4 Configuration. - Set VLAN ID as
11. - Save and apply.
For NOS / WOO, that’s the whole WAN configuration: DHCP with VLAN ID 11, no PPPoE credentials needed. The UniFi gateway should now obtain a WAN IP from your ISP directly through the ONU stick.
Step 8 (Optional): Suppress “Faulty SFP EEPROM” Alert on UniFi
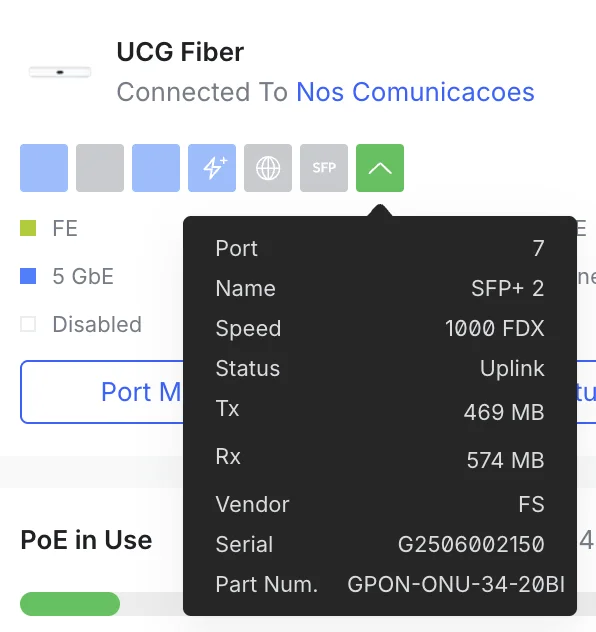
UniFi devices (including the UCG-Fiber) will log a “Faulty SFP EEPROM Detected” alert for this stick. This is caused by two known quirks:
- TX Fault pin: the stick permanently asserts TX Fault because it shares the same physical SFP pin for both the serial console and the TX Fault signal. UniFi interprets this as a hardware fault.
- Emulated EEPROM: the stick has no physical EEPROM; the Lantiq SOC emulates one in software, which fails UniFi’s strict SFF-8472 EEPROM validation.
✅ This alert is cosmetic. It does not block GPON authentication, WAN connectivity, or data throughput. You can safely ignore it.
However, if your OCD is as easily-triggerable as mine, you’ll want to suppress this alert. You can disable the TX Fault/serial pin sharing, but only after all configuration is complete and verified working, as it permanently disables the serial console after boot.
fw_setenv asc0 1
fw_setenv preboot "gpio set 3;gpio input 100;gpio input 105;gpio input 106;gpio input 107;gpio input 108"
reboot
To re-enable serial access later, you would need direct bootloader access via TTL serial:
FALCON => setenv asc0 0
FALCON => saveenv
Troubleshooting
Stick not reachable at 192.168.1.10
- Ensure your computer has a static IP in the
192.168.1.xsubnet. - Some UniFi gateways may need the SFP port configured as a management VLAN to allow access to the ONU management IP. Check UniFi’s network settings.
ONU stuck in state 3 or 4 (not reaching state 5)
- Double-check the serial number format: it must be exactly 4 ASCII letters + 8 hex characters.
- Confirm the Vendor ID and Equipment ID are correct for your ISP’s OLT.
No WAN IP on UniFi after ONU is online
- The ONU being in state
5means L1/L2 is working; the issue is likely the WAN configuration (PPPoE credentials, VLAN tag). - Check if your ISP requires a tagged VLAN on the WAN (common VLAN IDs: 10, 11, 100, 200, 835). In my case, it was a missing VLAN ID set to
11, as required by NOS / WOO.
Check LAN speed mode
onu lanpsg 0
link_status value | Speed |
|---|---|
3 | 1 Gbps (SGMII, auto-neg on) |
4 | 1 Gbps (SGMII, auto-neg off) |
5 | 2.5 Gbps (HSGMII, auto-neg on) |
The firmware defaults to 5 (2.5 Gbps). I have a 1 Gbps connection with NOS / WOO, and this default the stick presented itself correctly and negotiated cleanly.
In case you need to change this, you can do so:
fw_setenv sgmii_mode 5
Useful Commands Reference
| Task | Command |
|---|---|
| Check ONU status | onu ploamsg |
| Read all EEPROM | sfp_i2c -r |
| Get serial number | sfp_i2c -g |
| Get firmware version | strings /opt/lantiq/bin/omcid \| grep ^software_Version \| awk -F[=,] '{print $2}' |
| Get firmware build time | strings /opt/lantiq/bin/omcid \| grep compiled |
| Check env variables | fw_printenv |
| Reboot stick | reboot |
| Query OMCI MIB | omci_pipe.sh meg MIB_IDX ME_IN |
Final Thoughts
With the stick online and WAN up, the ISP’s ONT and router are gone from the path entirely as the fiber terminates directly on your gateway. If you’re still unsure whether the swap is worth the hassle, the reasons why I did it cover the power savings, control, and privacy benefits, but also the trade-offs that come with it.
I must say that for my NOS / WOO ISP specifically it was smooth sailing, but I am sharing this because I did not find any information for my specific setup and thought that others could benefit from it.